
Installing replacement windows in your house certainly isn’t your typical DIY project and is usually better left to the pros. Still, if you’re fairly skilled in home improvement and not afraid to dive into a big project it can be done. Keep in mind that with installing windows there is little room for error and mistakes can be costly. Still onboard? Let’s begin.
What you’ll need
- Safety glasses
- Cut-resistant gloves
- Cut-resistant sleeves
- Impact driver
- Utility knife
- Chisel
- Pry-bar
- Piece of 1 x 4
- Putty knife (5 in 1)
- Hammer
- Level
- Tape measure
- Heat gun
- Reciprocating saw
- Screws
- Masking tape
- Flashing tape
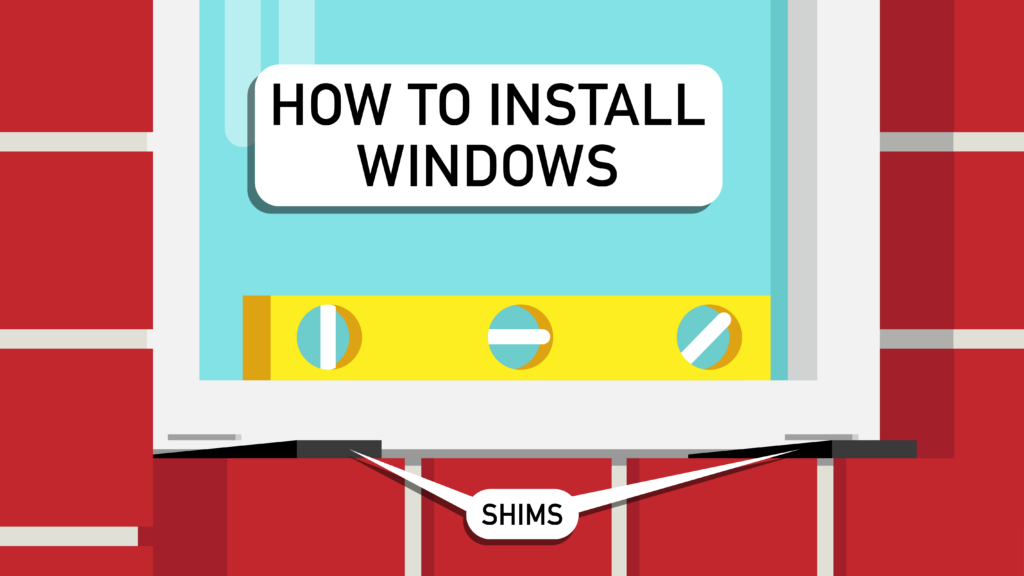
- Shims
- Caulking
- Low-expansion foam
- Drop cloth
Step 1: Ordering Your Replacement Windows
Once you’ve chosen the new windows for your house you’ll have to order your replacement windows there are a couple of different ways to go about this; standard sizes or custom sizes.
Standard-sized windows are going to cost less than custom sizes but they may not work in some of your openings. For example: when your home was built, if an opening was 36″ x 60″ a 35.5″ x 59.5″ window would have been installed but once the brick was done and the house has shifted and settled it may be impossible to go back with the original size. In cases like this, you’ll need to order a custom-sized window to install.
Measuring Custom-Sized Windows
Windows are always referred to in Width by Height. For accuracy, you’ll want to measure in at least three places on each axis; top, middle, bottom, and left, right, and center. If the window is large, get at least four.
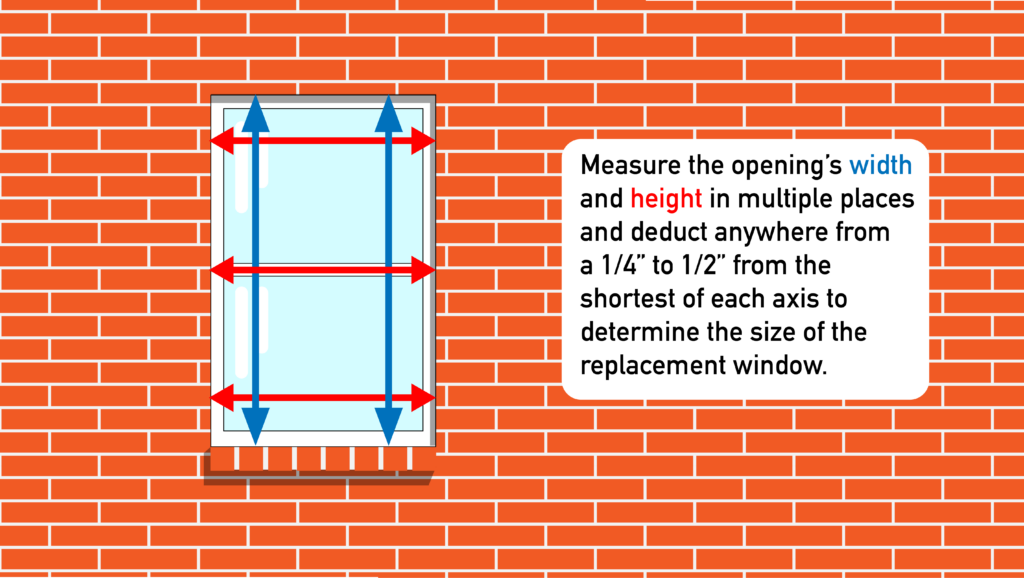
Once you have your three widths recorded, take the narrowest point and subtract a 1/2 inch to get your custom width; do the same with the height. This will give you 1/4 of an inch between the window and the opening. This matters because the opening may not be square and you need to be able to get the window level and square for it to operate correctly. More on this later.
Now, if you would like to deduct less and get a tighter fit, that’s up to you but I would recommend that you don’t deduct more than a 1/4 inch. When installing windows in siding, you can remove and reset trim boards if it’s too tight but brick is not so forgiving. Just be cautious.
Placing your order
Replacement windows, especially custom sizes can have some long lead times so plan accordingly. Before you order, triple-check your measurements and be sure that they are width x height. For your benefit, once they arrive, be sure that they are labeled in detail as far as where they go in your home. Make sure to confirm that they also meet building codes as far as tempering and egress are concerned. These codes are for your safety and should be followed. Plus, if you sell your home later any failures here would show on an inspection report.
You’ll also need to specify block-frame or nail-fin. Windows with a nail-fin (aka nail-flange) are made to be attached directly to the sheathing of the house. To do this you’ll need to be able to expose the sheathing by removing trim boards or stucco, which will need to be replaced or repaired afterward. In brick openings, block-frame is used and the window is secured through the window frame into the framing of the house. This method can also be used for siding and stucco applications since it can typically be done without the need for additional repairs to the exterior of the house.
Step 2: Removing the Old Window
Protect yourself, protect your home
Before you start installing windows, it’s a good idea to lay drop cloths inside and outside of the window you’re working on and wear eye protection, cut-resistant gloves, and sleeves. Confirm the measurements of the new window to ensure that it will fit before the old one is removed.
Remove the glass
If it’s an operable window, you’ll first remove the sash (the part that moves) with the glass and frame intact. The fixed portion will need to have the glass removed before it can be torn out.

The glass is held in by an adhesive on one side and a strip called a glazing bead (aka glass stop) on the other. First, the glazing bead will be pulled out then the adhesive is heated with the heat gun to soften it. Once it’s relaxed enough, insert a putty knife between the glass and frame and work it around to break the bond. Now, carefully remove the glass.
Remove structural members
After the glass has all been removed you’ll need to remove any remaining structural members inside the frame so you’re only left with the perimeter of the window. You may be able to knock one end loose and work the other free or they can be cut out with a reciprocating saw.
Remove the frame
Using a pry bar you’ll start collapsing the frame in on itself. This can be difficult depending on how well the window was installed initially but the idea is to tear the nail fin free of the nails. Be sure to use a piece of 1 x 4 to pry against so your brick, sheetrock, and trim are protected for added cushioning you can wrap it in painter’s tape.

Step 3: Prep For Installation
Clean the opening
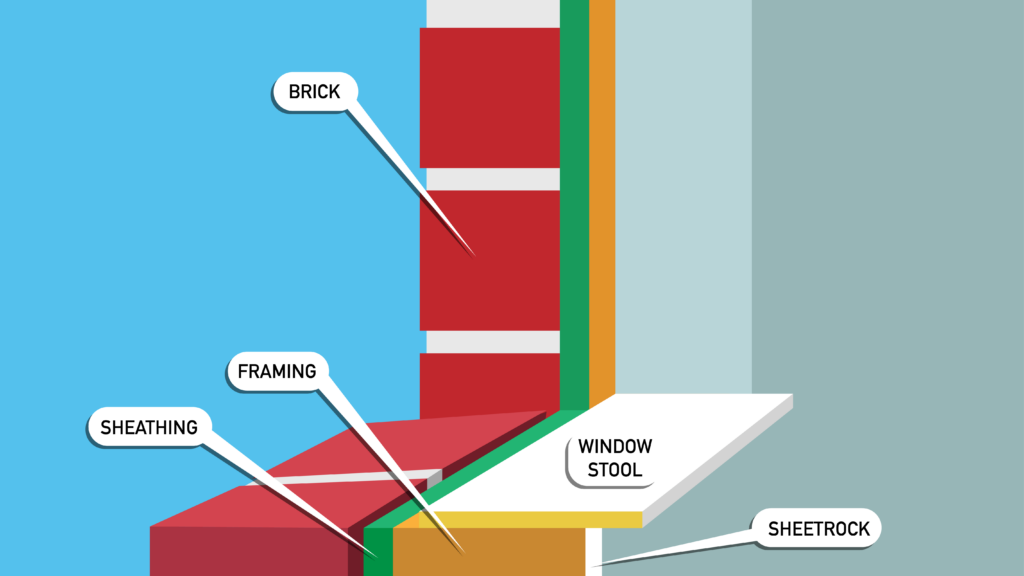
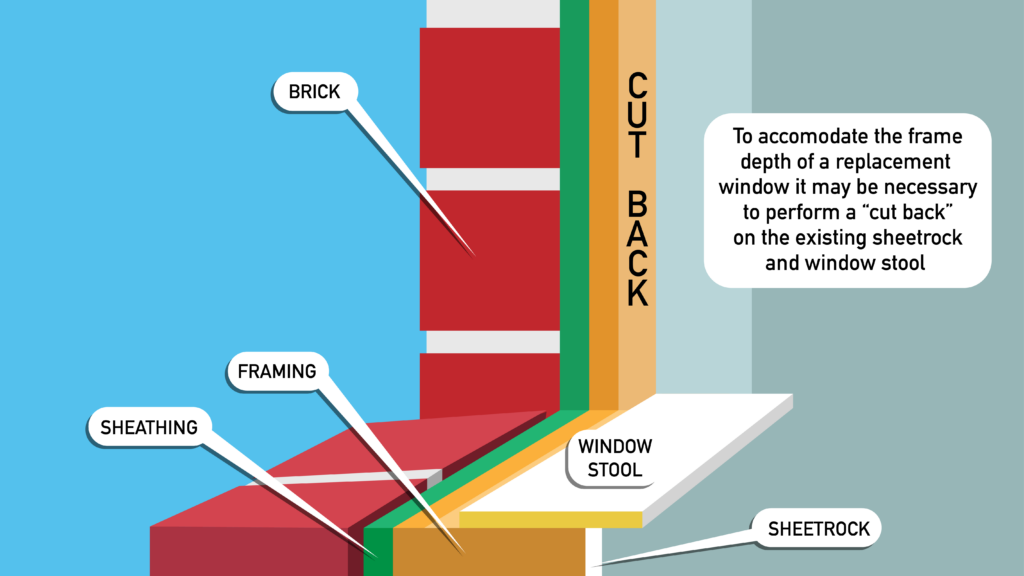
Prep the opening by removing debris, nails, excess mortar, dust, and anything else that could present an issue with installing the window. Very often, the frame of the new window is significantly deeper than the old window you may need to perform a “cut-back” by removing a strip of the sheetrock and window stool to allow space for installing the window.
Flash the opening
Flashing tape is used the shed any water that gets between the exterior of your home and the sheathing, to do this successfully it will need to overlap from top to bottom so the water has no place to go but down and stay out of your home. Starting at the sill (bottom) of the opening, apply flashing tape.
Turn the sill up the corner a couple of inches and overlap it with the pieces of flashing tape on the sides. In the same way, install the head (top) flashing to overlap the side flashing a couple of inches. As an added layer of protection, you can also run a bead of caulk where the framing of the opening meets the sheetrock and/or trim.
Step 4: Install The Window
Set the window
In order for the newly installed window to function and operate properly it needs to be plumb, square, and level. Plumb and square, particularly with a window that operates such as hung windows and casements but windows need to be installed level so their weeping systems drain properly. Set the window with shims underneath and adjust them using a level to verify that the sill is level. Installing the window with composite shims is a good idea so they won’t rot over time.

Secure the window
With the window centered in the opening and shims being used to keep the even reveal, run a couple of screws through one side of the window into the framing of the house. The studs should be doubled which will give you three inches of material and you’ll want to use a screw that’s long enough to penetrate anywhere from 2″ to 2 1/2″ into the framing. It’s important not to over-tighten as this could deform the window and prevent it from functioning properly.
Once you’ve confirmed that the newly installed window is still plumb and level, run a couple of screws through the other side of the window. You don’t need a lot of screws to attach the window, you’re really just holding it in place and the foam and caulk are going to get it really nice and secure. On most windows, two to three screws on each side will do the job and you never run any fasteners through the bottom of the window. The window is designed with a weep system to get water and condensation out of the frame and if you start putting holes in it not only will the window leak but you’ll void your warranty.
Step 5: Seal The Window
Foam the window
Use a low-expansion foam to seal the gap between the window and the opening as a foam with expansion can put too much pressure on the window you’ve just installed and cause it to malfunction and could even crack the glass. Since it does expand you don’t need much and it’s always better to add more instead of trimming off excess. You should also use a quality product since this foam is what is going to defend against air leakage. What’s the point in installing a nice new replacement window if it’s not sealed?
Caulk the window
Once the foam is set you can caulk between the window and the opening. It’s a good idea to mask off the edge with painter’s tape so you get a nice, clean line. Again, you don’t want to skimp on the product here. Cheap caulk in the elements is going to shrink and crack and you’ll be redoing it in a couple of years. Use something like OSI Quad MAX or equivalent; if you need to cut installation costs you can use a less expensive caulk on the inside where it’s not exposed to sun and rain.
Step 6: Register Your Warranty
This step is often overlooked but it’s an important part of getting the most out of the house full of windows that you’ve just invested your time and money installing. Many window manufacturers will have a transferable warranty which is a great selling feature should you ever decide to move.
Step 7: Clean And Maintain Your Windows
To get the most out of the installation of your new windows keep them clean and maintained. Maintenance is relatively simple and usually only needs to be done once a year. It’s as simple as operating all of your windows and lubricating them with a dry lubricant to keep them operating as smoothly as when they were installed.
Option 2: Use A Professional
If you’ve come this far and decided that it’s not for you, after all; go to JeffsList.com to find a trusted window installer in your area.